Sunday, January 15, 2012
1950's
For one of my final looks I thought I would do another time period that I am in love with. There is something about the 50's that I love.what first caught my nearest and made me fall in love with the 50's was the movies. Sometime I dream that my life was a 50's movie, guys with amazing style, everyone breaking out into song and dance, and also there refreshing incants they had. Also then came the celebrities that had a grace to them that we just don't have now a days. Actresses such as Grace Kelly, Marilyn Monroe, and Audrey Hepburn. Then the handsome bad boys, that every girl wanted to marry, like Elvis Presley and James Dean. It seemed also fitting that I am currently in rehearsal for for the musical Happy Days taking place in 1959. Also just researching and finding out more about the 50's and what it was like back then has helped me with the musical.
For this looks I did a school basic school girl look and soda jerk look. For the makeup I did something very simple a little foundation set with some powder then finished off with a little blush. I got most of my research and information from grandma. She helped me put together this look, told me what the hair looked like and told be about formals and her uniform when she was a soda jerk. So for the hair I then did a some soft curls, and used bobby pins to pin the hair in place. A refrained from doing the ever so lovely ducktail.
Tips for this look: keep everything lite there was a lite and fresh innocents to this time period. For the hair pin curls were in so you don't have to use a curling iron to achieve the look.
Hint for next week: the Finally
PHOTOS COMING SOON!
Marilyn
 Marilyn Monroe she was the sex icon of the 50's, also the perfect person to use for a contouring page. Contour is when you use makeup to change the shape of certain feature on the face to change the appearance of a person. When looking at a person feature you can tell certain features stand out more. For Marilyn Monroe I used my brother Spencer's fiancé. She was perfect a blonde but had darker root with a widows peek like Marilyn and had features I could contour to look similar to Marilyn.
Notes for the look:
Marilyn Monroe she was the sex icon of the 50's, also the perfect person to use for a contouring page. Contour is when you use makeup to change the shape of certain feature on the face to change the appearance of a person. When looking at a person feature you can tell certain features stand out more. For Marilyn Monroe I used my brother Spencer's fiancé. She was perfect a blonde but had darker root with a widows peek like Marilyn and had features I could contour to look similar to Marilyn.
Notes for the look:


When I started this look I started out look at Marilyn's features. I notice areas that were highlighted: the bridge of her nose, the middle of her forehead, apple of her cheeks, and her chin. Then I looked for the areas that were darker: the sides of her forehead, under the apple of cheeks, and the sides of her nose, with a darker crease in the eyes. Her hair is a nice natural curly wave. For the make up I started by taking some concealer and putting it on the areas I wanted to high light so that they were marked off. Then I went in and reshaped her eyebrows I too, a dark brown shadow and drew a crease I and reshaped the eyes. With a more of a triangle crease. Then I darkened the corners of the eyes and put wrinkle lines under the eyes. And I added smile lines. I added a white line in the corner of the eyes and did a smudged cat wing eye liner. Then I made her lips fuller with a peachy pink lip stick. Then I added darker bronze to the bottom of the cheeks and blended that into the conceal that high lighted features.
 For the hair I did a volume soft curls and had to shorten the her hair. I curled the bottom of her hair and did a sweeping bangs. And then bobby pinned her longer hair and tucked it into the turtle heck she was wearing. For the costume at did a daily Marilyn Monroe outfit. White high wasted capris and then I added a black belt to bring in her waste to make her hips look bigger like Marilyn Monroe. Then she put on a black turtle neck and tucked it into the capris.
Tips for this look: really study the face you are doing the contouring for, study highlights and low lights. Also have a lot of colors such tans, browns and lighter whites.
Hint for next week: they were truly Happy Days.
Hand in Hand 2
I really need to poster two blog about this because Well it did take up two sheets of my portfolio and I didn't want to try and cram their life into one page or one blog. Also I wanted to talk about my inspiration for their pictures and why they are the way they are. In every picture you will notice Jordan in short back yellow leather chair. And Kelsey in a white high back woven fabric chair. I put them like that for a very specific reason. Going back to my inspiration, Up. In the movie you will always see the couple Ellie and Carl sitting and reading books or by in the room with these two mismatched chairs. One with a shorter back the other with a tall curvy back. So I thought to make the look complete I had to set up the scene for the look. And now to continue the aging process.
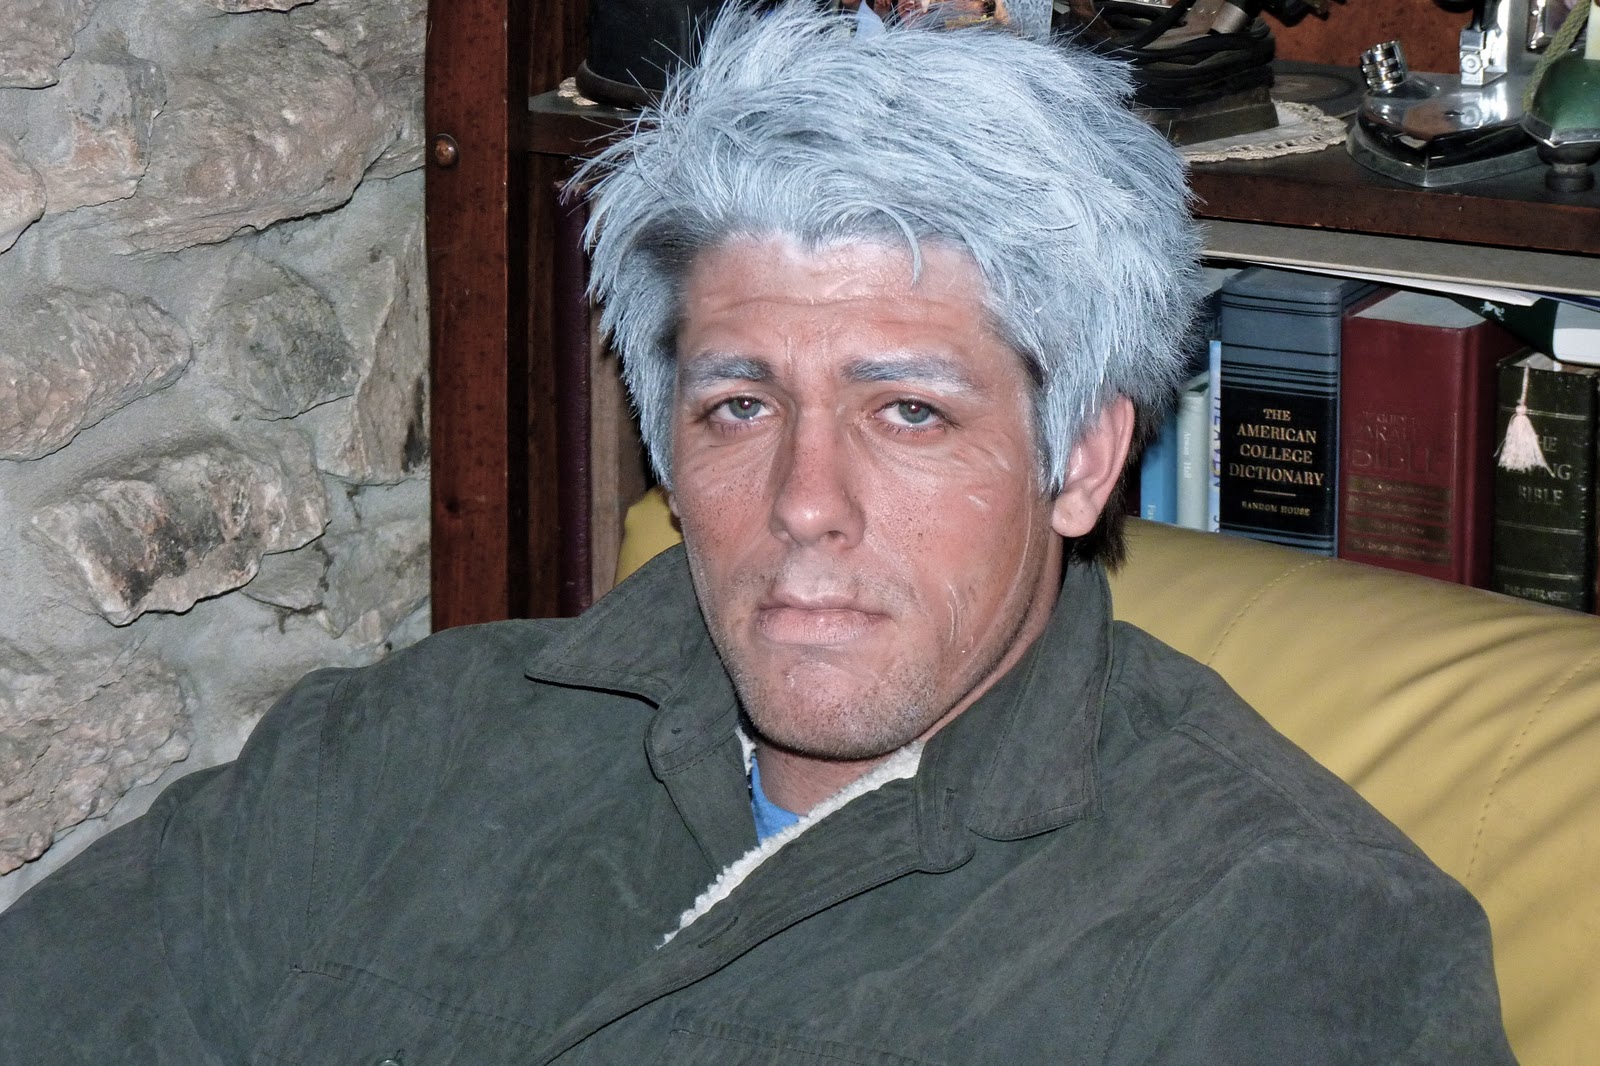
60's This is when it starts to get fun. Here I really shorted Kelsey hair and made it close to all grey. And I also started to thin out her lips and sink in her eyes. Also doing the same for Jordan but then not just greeting his hair but making his facial hair grey.


70's This is when I started really adding ages spot. When looking at a older person to will notice some discoloring in their skin. Well to achieve that look you use a stippling sponge its a rough prickly sponge that you can make a bunch of little dot with. Then after a few aged spot you will notice under their eye it is not only wrinkly but a little pink and kind of puffy for lack of better words. Then you start adding wrinkles in the cheeks and so on. Now they should be fully grey, in my family my grandma is in her 70's and doesn't have hardly any grey hair, but for portfolio reasons I made them all grey.


80's I just added darker age spots and more of them. Thin out the lips a bunch well also adding wrinkle down he neck and thinning the lips more.


90's This was the final age I had and so I really sunk in the yes with some dark shadow. Then adding some white to the brow bone to contrast with the dark shawl to make it look sunken in. Then I just proceed to add more wrinkle and at this point The hair couldn't get any more grey then it was. The final picture was the couple holding hands covered with blankets reading books.


 If your wondering why these two blogs are called hand in hand it is because my sister wrote me a poem I have going through out each look in each of the pages and it is call Hand in Hand, and here it is.
It started with a promise,
We sealed it with a kiss,
This journey, this path
Hand in hand.
 We grew up together,
We blossomed and changed,
But we did it together
Hand in hand.
Times of good and bad,
Sometimes life got in the way
Love was our glue
Hand in hand
The kids grew up
Had kids of their own
And we watched them grow
Hand in hand
In the winter of our lives
We just sat and smiled
And knew we'd survived
Hand in hand
Tips for this look: Pretty much the same as he other tips and have have fun with the old age god know my brother did.
Hint for next look: Being a sex symbol is a heavy load to carry, especially when one is tired, hurt and bewildered.
60's This is when it starts to get fun. Here I really shorted Kelsey hair and made it close to all grey. And I also started to thin out her lips and sink in her eyes. Also doing the same for Jordan but then not just greeting his hair but making his facial hair grey.


70's This is when I started really adding ages spot. When looking at a older person to will notice some discoloring in their skin. Well to achieve that look you use a stippling sponge its a rough prickly sponge that you can make a bunch of little dot with. Then after a few aged spot you will notice under their eye it is not only wrinkly but a little pink and kind of puffy for lack of better words. Then you start adding wrinkles in the cheeks and so on. Now they should be fully grey, in my family my grandma is in her 70's and doesn't have hardly any grey hair, but for portfolio reasons I made them all grey.


80's I just added darker age spots and more of them. Thin out the lips a bunch well also adding wrinkle down he neck and thinning the lips more.

90's This was the final age I had and so I really sunk in the yes with some dark shadow. Then adding some white to the brow bone to contrast with the dark shawl to make it look sunken in. Then I just proceed to add more wrinkle and at this point The hair couldn't get any more grey then it was. The final picture was the couple holding hands covered with blankets reading books.


It started with a promise,
We sealed it with a kiss,
This journey, this path
Hand in hand.
 We grew up together,
We blossomed and changed,
But we did it together
Hand in hand.
Times of good and bad,
Sometimes life got in the way
Love was our glue
Hand in hand
The kids grew up
Had kids of their own
And we watched them grow
Hand in hand
In the winter of our lives
We just sat and smiled
And knew we'd survived
Hand in hand
Tips for this look: Pretty much the same as he other tips and have have fun with the old age god know my brother did.
Hand in Hand
This particular transformation I have been very excited for because it was inspired off one of my favorite animated movies, Up. In the beginning of up there is about 5 min montage of the character life it starts on their wedding day and shows them growing older and older until Carl the main character come home from his wife's funeral. Well I think it one of the most beautiful thing I've seen and can't help but cry every time I watch it. It inspired me to do old age makeup. I wanted to take a guy and a girl and have their wedding pictures be the first photo on the page and then make them grow old and older. Lucky for me this passed summer my brother Jordan and his beautiful wife Kelsey got married. So I had wedding photos and they were the perfect couple to be my models.


When considering what I wanted to do I first thought about what ages I wanted to do. People told I should go up every 20 years because five to 10 years you don't change that much. Then I realized you actually do change if you really have an attention to detail so I thought that would be a good thing to show the colleges that I am apply to. So I went up every 10 years to show a natural slow progresses state of their transformation.
Wrinkles how to: You take a makeup brush that is small and flat, similar to a paint brush. Then you get some brown, white and tan stage makeup. To make the wrinkle have the person make a face that creases the area you want to age. For the eyes you would have them close their eyes really tight to create crease line around the eyes. Then you take a draw brown lines in those creases. The blend out and add white and tan to make them pop.
30's I really didn't do much I just made them a little more seasoned. I add a little grey just to the side of the hair, added some darker lines under the eyes and a little bit of crows feet in the corners of the eyes.


40's I added more grey to the hair I style Kelsey's hair a little different giving her a at home mother look. I gave Jordan a weekend business man look. I then added some more wrinkles under the eyes to the forehead, also smile line wrinkles.


50's I started to shorten Kelsey's hair because most women as they age their hair starts to get shorter, then I added more grey. For wrinkles I added some to the forehead, middle of the, eyebrows, and smile lines with more eye wrinkles. My brother Jordan, well its hard to get his hair to much of anything except stand straight up. I parted on the side a used bobby pins to make it lay flatter, then added more grey.


Tips for this look:
 really do some research for me that just mean lot of picture of old people and aging.
Also look at family members I got a lot of inspiration from my family and looked at how we age because all people age differently some better then others.
really do some research for me that just mean lot of picture of old people and aging.
Also look at family members I got a lot of inspiration from my family and looked at how we age because all people age differently some better then others.Hint for next look: Life goes on.
Here is the opening from Up.
Blizzard
 For this look it was my personification of a blizzard. I got the idea from my sister who went to a natural disaster Halloween party and dress up as a hurricane. I thought it would be cool to do this on in winter with the snow and just my luck there was no snow this winter. The picture and look still turned out cool so, it's all good.
I started off curling the all of my sister hair. In loose curls, if hair has curls in it it teases easier. Once the entire head is curled, I started teasing the crap out of her hair. I split her hair on the drastic part, put bobby pins in her hair at the front and made a fake finger wave. Then I wanted to make it look like her hair was blowing in the wind or was frozen. So a combed the hair flat to the right side of her hair. And started pinning away at her hair. Then I added a little white spray to the top of the bun to make it look like snow or like ice.


Tips for this look:
1) Really play up the hair and tease the crap out of it, don't be affraid to use a lot of bobby pins I think I used over 65 total in Casey's hair.
2) Stick to a lot of whites and silvers thin looks that remind you of winter.
Hint for next look:
It started with a promise,
We sealed it with a kiss,
This journey, this path
Hand in hand.
Masquerade
 I picked this look because of my love for the musical Phantom of the Opera. One of my favorite song and scenes from the musical and movie is the song Masquerade. I thought it would be fun to come up with a masquerade look but make it a little different and a little more unique.
For the makeup look you will need lace, threaded beads, and liquid eyeliner. I started out by taking foundation and applying it to the face, then I set the foundation with some loose powder. For the eyes I took a gold shimmer shadow and applied it all over the eye lid. Then came the fun part I took black lace that I got at a local craft store and I cut them out to the shape of the eye lid up to the eye brow. Then once I got them to the shape I wanted and so they matched, I took eyelash glue and glued them to the eye lids. Then to clean up the edging of the lace I took some black liquid liner drew in a solid edging. On the bottom of the eyes I wanted to match the dramatic lace on the top so I took some black thread, and threaded up some blacks and silver beads and used eyelash glue again to attach them to the bottom lash line. Then I finished off the look with a little bit of blush and a nice red lip.


Tips for this look:
1)take your time and make sure that the lace shape is the same. Make sure to let all the glue set before you let go of it.
2)Have fun with it if you don't like the beads on the bottom try something else maybe some fun bottom lashes.
Hint for next look: Poppin bottles in the ice.
Subscribe to:
Comments (Atom)